
TheSky’s astronomical databases can quickly locate any one of up to 1.7 billion objects, either by clicking on the object on the Sky Chart (called “identifying a target”) or with the Find command from the Edit menu.
The Sky Chart is linked to TheSky’s astronomical databases. Click the left mouse button on any celestial object to identify it and display the Object Information Report on the Find window (the Find window will be displayed automatically if it is hidden). The Object Information Report provides a wealth of information about the object.
You can also search for objects by name or catalog number using with the Find command on the Edit menu (see “Finding Objects” on page 72 for more information).
A red bull’s eye appears on the Sky Chart at the mouse click position (Figure 25) and identifies this object as the target object, or target. Tool bar buttons that act on, or apply to, the target include a red or green target graphic.
· the object’s common name and/or its catalog designation
· the graphical symbol used to represent this object on the Sky Chart
· cross references to other catalogs (in the Name 2–Name 10 fields)
· the object’s type (planet, variable star, irregular galaxy, and so on)
· the constellation in which the object lies
· the object’s magnitude
· a star’s Bayer (Greek-letter) brightness designation
· the plain English Dreyer description for the object
· the object’s distance from Earth, in light years and AU (where available)
· catalog-specific information (such as min/max magnitude of variable stars, spectral class, parallax, proper motion, position error, distance from the Solar System)
· the object’s topocentric equatorial (RA-Dec) coordinates, for both the date specified in the Date and Time window (page 144) and Equinox 2000.0
· the object’s current horizon (Az-Alt) coordinates
· the object’s rise time, transit time and set time for the site location and the object’s angular dimensions
· the angular separation from the last object identified
· Distance in light years (Gaia stars)
· the object’s position angle (the angle between the line connecting the object and the last-identified object, and the line connecting the last identified object and the North or South Celestial Pole)
· Other catalog and object-specific information
“Appendix J: Object Properties” on 827 includes a comprehensive list of the object properties used by TheSky.
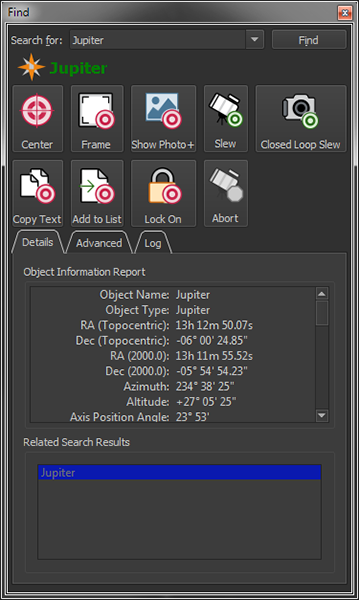
Figure 24: The Object Information Report appears on the Details pane of the Find window (Edit menu).
The target is highlighted with a red bull’s eye on the Sky Chart (Figure 25). Press the ESCAPE key to hide the bull’s eye.
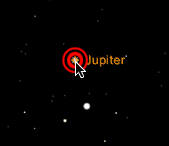
Figure 25: The Sky Chart displays a bull’s eye centered on the current target.
The object you clicked on (or located using the Find command), and up to ten “nearby” objects (or objects with names that closely match this object), are listed in the Related Search Results box. This eliminates any need to click exactly on the object and makes it easy to study groups of objects without having to click on each one. If you click in an area without any nearby objects, the Mouse Click Position is the only entry.

Figure 26: The text color indicates the object's visibility (green means the object is currently above horizon; black text means it is below horizon).
The object’s symbol (a yellow star in Figure 24) is displayed next to the object’s name. When the object’s name is displayed with green-colored text, the object is presently above the horizon. Black-colored text means the object is currently below the horizon.
At wide fields of view, galaxies, nebulas, and open clusters are displayed as their standard symbols. At higher magnifications, the symbols are replaced with circles or ellipses that represent the shape and dimensions of the object. Within these extended objects, there is no marked point on which to click. If the object is displayed as a circle, you can click anywhere within the circle. For objects displayed as ellipses, click within the circular region defined by the ellipse’s minor axis, as shown in the drawing below.
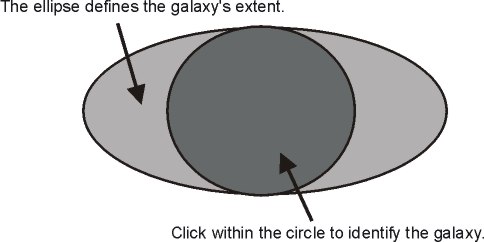
Figure 27: Click inside the shaded circle to identify the extended object (galaxy).
The Andromeda galaxy (M31) is one example of an extended object. You need to click on a point towards the center of M31 – without too many nearby stars – to identify it. Click on the central region of stars to identify them.
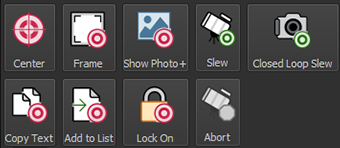
Figure 28: The target object-specific buttons on the Find window.
The Center button repositions the Sky Chart with the identified object at the center.
The Frame button repositions the Sky Chart with the identified object at the center and adjusts the field of view to show extended objects.
The default field of view for point sources (or cataloged objects that do not have size information) is 10 arcminutes. To use a different framed field width, change the Default Frame Size when Object Size is Unknown value on the Non-Stellar Object Options window from the Display menu.
If the identified object has a photograph (not all objects have photographs), the Show Photo+ button shows it in the Photo Viewer window (Figure 29).
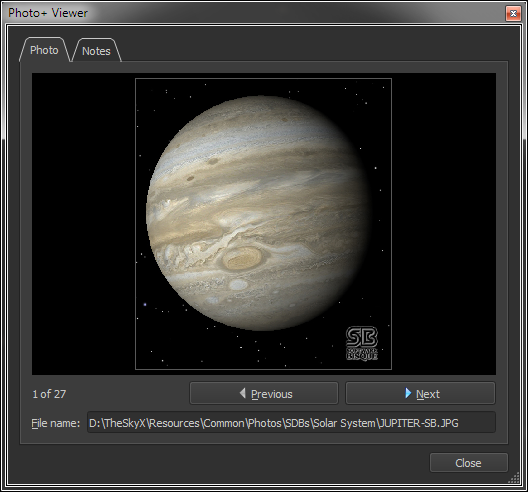
Figure 29: Photo Viewer window showing a photo of Jupiter.
If the identified object is a star that has spectral class information, a Hertzsprung-Russell (HR) diagram is displayed instead. The yellow crosshairs show star’s color relative to other stars.

Figure 30: HR Diagram for a Hipparcos-Tycho star 68686.
Choose this option to graph only the Hipparcos stars that are on the current Sky Chart.
Choose this option to show the brightest stars from the Hipparcos catalog on the current Sky Chart.
TheSky includes interesting and educational notes on the constellations, many Messier, IC and NGC objects as well as hundreds of stars.
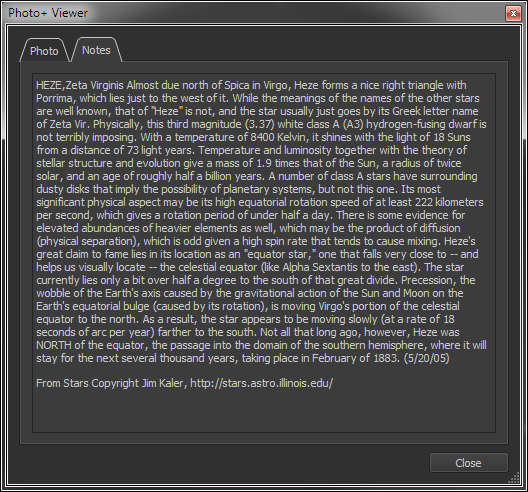
Figure 31: Notes for the star named Heze.
· Constellation notes based on the book Star Tales by Ian Ridpath
· Star notes from Jim Kaler (professor emeritus of astronomy, University of Illinois)
· Visual observing notes of selected objects by Steve Gottlieb
· Visual observing notes of selected objects by Tomm Lorenzin
These notes are copyrighted and distributed with permission.
When a telescope connection is established, click the Slew button to command the telescope to slew to this object.
If you change your mind after clicking the Slew To button, click the Abort button to terminate the slew. This button is available only while the telescope is slewing.
To copy all the information in the Object Information Report to the Clipboard, click the Copy button. Or right-click (z+click on macOS) on the report and click the Copy Text command in the pop-up menu.
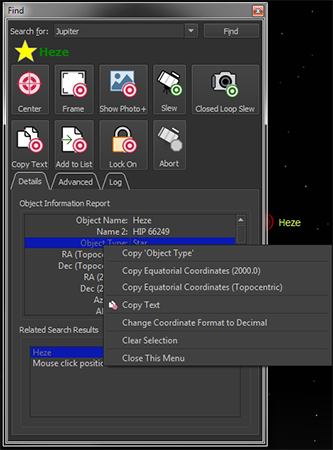
Figure 32: Right clicking the mouse over the left column of the Object Information Report to show a context pop-up menu.
To copy the contents of a single field, move the mouse cursor over it, right-click the mouse (z+click on macOS) and then click the Copy ‘<Field Name>’, where ‘<Field Name>’ is the name of the information field beneath the mouse cursor.
Other pop-up menu commands allow copying just the equatorial coordinates (2000.0 or current), or toggling the number formatting between sexagesimal and decimal format.
TheSky can create an observing list of the objects. To add this object to the Observing List, click the Add to List button. See “Observing Lists” on page 296.
If the target object is a planet, moon, or other solar system object, click the Lock On button to pin this object to the center of the Sky Chart. Locking on to a solar system object can reveal interesting phenomena. For example, the motion of Jupiter’s moons can be observed by locking on Jupiter, then performing a time skip, and can be reveal when a Jovian moon’s shadow is visible on Jupiter’s surface (shadow transit, page 184) or when a moon passes behind the planet (occultation, page 184). The procedure described below can also be used to track the motion of other solar system objects.
1. Choose the Find command from the Edit menu.
2. Type Jupiter. in the Search For text box, then click the Find button. Note that placing a period immediately after any name in the Search For text box and then clicking the Find button automatically frames the object on the Sky Chart. If the period is omitted in the search for text, click the Frame button to frame the Jupiter now.
3. Click the Lock On button to pin Jupiter to the center of the Sky Chart.
4. Choose the Celestial Sphere command from the Orientation menu to orient the Sky Chart so that the celestial pole is toward the top of the window and Jupiter’s pole always points up on the screen.
5. From the Date & Time window, choose a time skip increment of 1000x (or other time skip increment), then click the Go Forward button to watch the motion of Jupiter’s moons over time.
Figure 33 shows a rare “triple shadow transit” that occurred back on January 23, 2015. For U.S. residents, the next similar event does not occur until December 30, 2032!
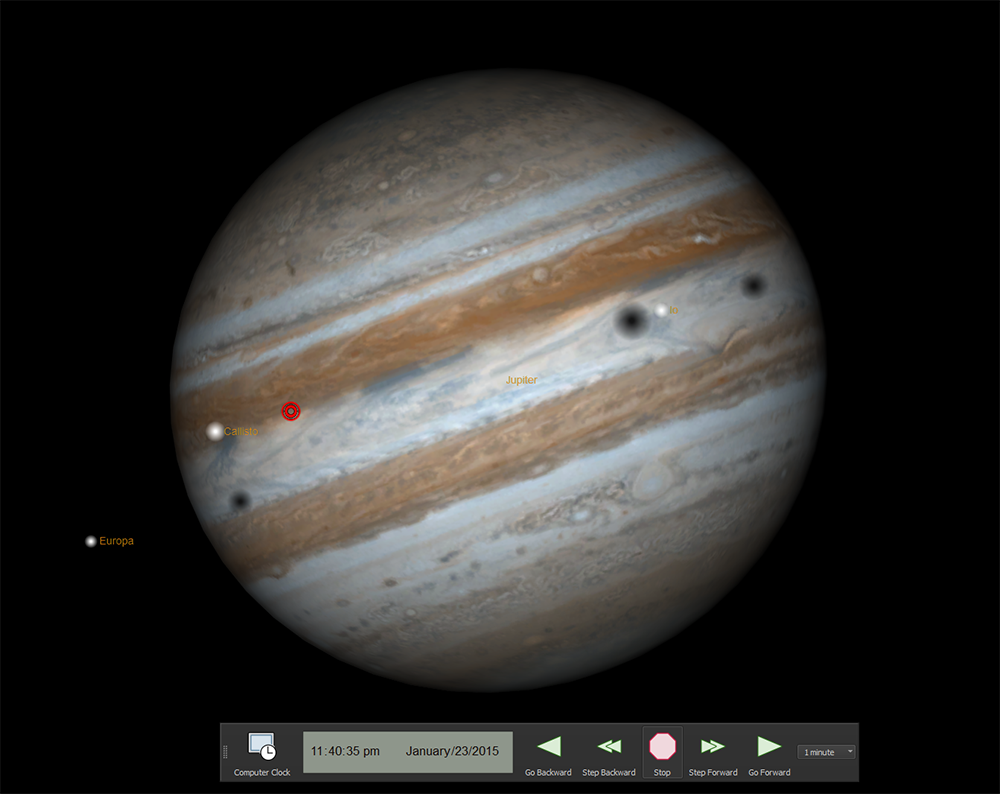
Figure 33: Sky Chart showing a triple Jovian moon shadow transit.
As a reminder, the text Locked on <Solar System Object> appears in the lower right corner of the Sky Chart. Left click and drag the screen to break the lock.
Objects outside the solar system cannot be locked on.
As a reminder, the text Locked on <Solar System Object> appears in the lower right corner of the Sky Chart. Left click and drag the screen to break the lock.
Objects outside the solar system cannot be locked on.
You do not have to locate an object in the Sky Chart to get information about it. The Find command in the Edit menu can locate every object in TheSky’s databases.
You can also access it by pressing zF, or by clicking the Find button in the Edit toolbar. Selecting the Find command displays the Find window, which provides several ways to locate any object.
One way to find an object is to enter its name (Aldebaran, Bear Paw) in the Search For text input. You can enter the names of comets, minor planets, and auxiliary objects that appear in any active Sky Database.
For example, to find the Orion Nebula, type Orion Nebula and click the Find button. The Object Information report shows details about the Orion Nebula. If the Orion Nebula is within the current field of view, it is marked with a bull’s eye.
You can also search for a star by manually entering its Bayer (Greek-letter) magnitude designation, followed by the constellation’s three-letter abbreviation. For example, to find the third-brightest star in Orion, type Gamma Ori. Clicking the Find button locates that star, Bellatrix.
Star names are Greek, Arabic, or Latin. You do not have to know the correct spelling. The Find command shows you matching names.
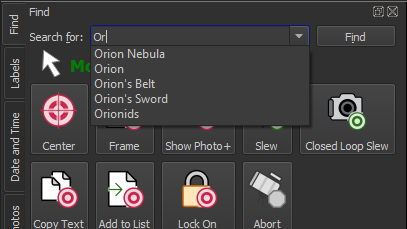
Figure 34: A list of matching names appears as you type.
For example, if you enter ‘Or” the Search For text input shows objects that start with these letters.
The Milky Way (our galaxy) is displayed as a photograph or draw as a polygon that can cover a significant portion of the Sky Chart. Keeping track of its boundaries in all cases would consume too many resources. It was therefore decided not to identify the Milky Way when you click inside it. At narrow fields of view, the Milky Way’s boundaries are not usually visible, and the polygon forms a solid background color. This is potentially confusing (“Is that the Milky Way or a nebula?”), so the Milky Way is not displayed at fields of view below 20°.
The Magellanic Clouds (the two smaller galaxies “attending” our galaxy) are large, complex objects. The Small Magellanic Cloud is shown as a filled ellipse and is easy to spot in the Sky Chart – it’s located at a right ascension of about 1h, not far from the south celestial pole. Type the text ‘Small Magellanic Cloud’ in the Search For text input and then click the Find button to locate it.
By default, the Large Magellanic Cloud is not shown as a specific object. To display the region in which it is located, search for Large Magellanic Cloud. To have TheSky draw a polygon that represents this region, select the Large Magellanic Cloud Sky Database in the Database Manager window from the Input menu.
Because it can be difficult to type keyboard keys in the dark, TheSky includes a method for entering catalog numbers with the mouse.
On the Advanced Find tab, click the numbers (and the decimal point) on the right to enter numerical keys. Clicking Space enters a space. Clicking Back deletes the last (rightmost) character in the edit box, regardless of the current location of the text cursor.