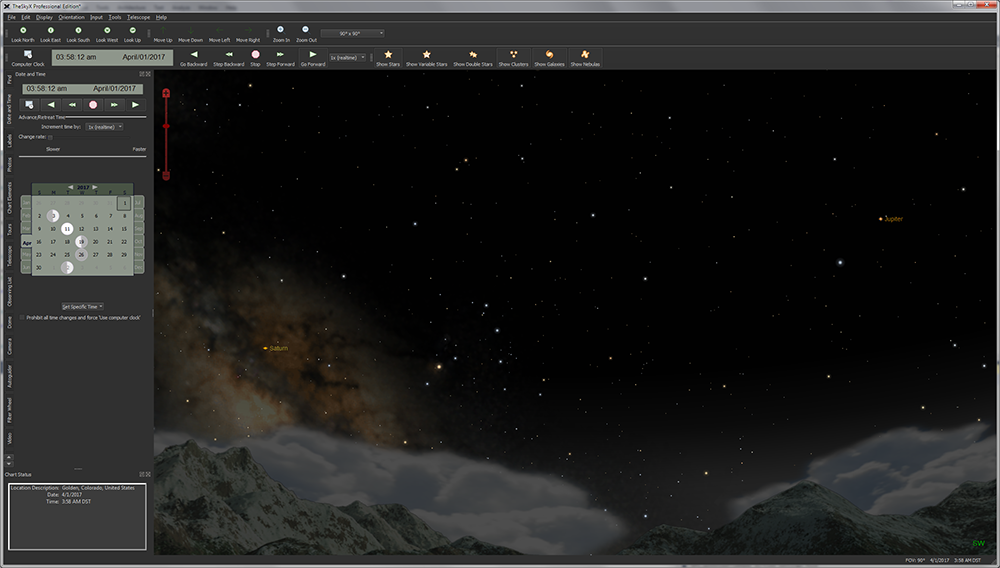
The star chart display is the heart and soul of TheSky. We call it the Sky Chart, to distinguish it from the real thing. To the left of the Sky Chart, you’ll find a series of stacked windows with vertical tabs to access the most commonly used commands and options. You can show or hide stacked windows from the Display menu.
Figure 8: TheSky’s default screen showing the Sky Chart, with stacked tool windows on the left and toolbars on the top.
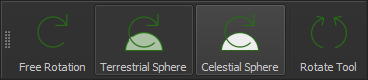

Figure 9: The Orientation, Move and Date and Time toolbars (click and drag the checkered “gripper” on the left side of each toolbar to move it).
When TheSky is first launched, it attempts to automatically set your location using the web; the date and time are read from your computer’s clock.
You’ll also notice that if you are using TheSky during daytime, the sky it displays is blue (just like the actual sky). In a moment, we’ll describe how to change that to a night view even during the day.
To help you get started and more easily identify commands, the toolbar buttons are configured with large icons and text description.
The software authors understand that showing both a graphic and text consumes valuable real estate on notebooks, smaller computer screens, or when operating TheSky from a remote computer. To reduce the size of the toolbar buttons, click the Preferences command from the Tools menu (TheSky menu on macOS), then click the Toolbars icon. In the Appearance pop-up, select Icon Only; in the Size pop-up, select Small and then click Close. See “Customizing Toolbars” on page 206 for more information.
Right now, let’s make sure that the program is set to display the Sky Chart from your location.
Home is where you hang your hat, and where most of you probably view the sky. The first time TheSky is launched, your computer’s IP address is used to place your location on Earth, typically within a few miles, which is close enough for casual astronomy work. When observing occultations, or for precision telescope control, you’ll want to use a GPS or smartphone to determine the coordinates of your position on Earth accurate to less than few meters.
If you know the precise longitude of your location, you can enter it, or choose the name of the city you live in, or the one closest to you, from the list in the Location window.
1. Highlight the Input item in the main menu.
2. Select the first command, Location.
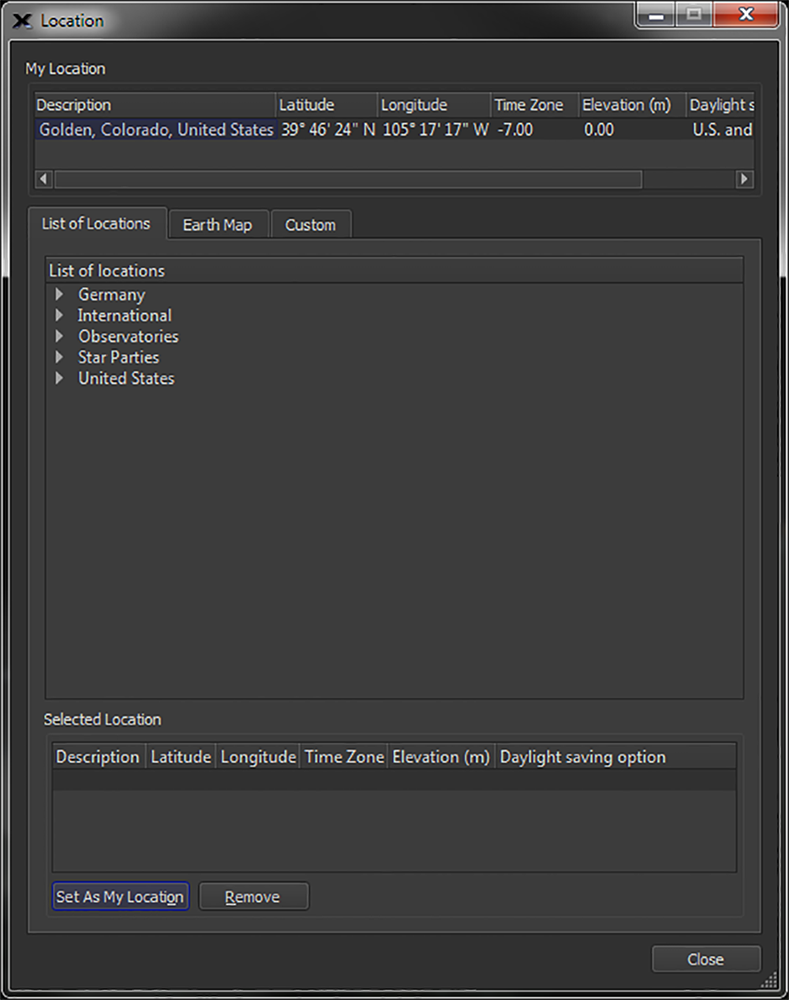
Figure 10: Location window, List of Locations tab.
A window appears displaying options for setting your location. From the List of Locations tab, if you live in the U.S., double-click on United States. A list of the major cities within your country appears. You can choose your city, or the one closest to where you live, by double-clicking on it.
The My Location table shows your location on Earth as defined by its longitude, latitude, time zone, elevation, and Daylight-Saving Option.
The location Description is for reference purposes only. Double-click the description to change it.
The time zone of a location on Earth is defined as the difference between Coordinated Universal Time (UTC) and local time, in hours. For most locations, this equals your longitude divided by 15 degrees. In some regions, the value used for time zone can differ by plus or minus one hour.
If you are unsure of your time zone, try searching the web for the time zone of a nearby city. For example, a search for “time zone Golden Colorado” shows the following information:
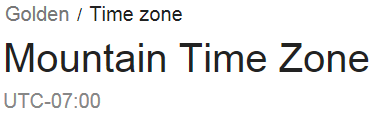
Figure 11: Results of a Google search for Golden, Colorado’s time zone.
If you live in Golden, Colorado, USA, enter minus seven (–7) hours for the time zone.
TheSky can be configured to automatically “spring forward” when Daylight Saving Time begins, then “fall back” when it ends. Select the Daylight-Saving Option that applies for your region.
See “Appendix C: Daylight Saving Time” on page 809 to see the starting and ending dates for each option. The Not Observed option means that Daylight Saving Time is not observed for the location, so TheSky’s time does not change during the year, for example, if you live in Tucson, Arizona, USA.
TheSky includes a large database of pre-defined locations that can be used to get you “close enough” to your home location.
When a location is highlighted in the list, the Selected Location table shows the details for this location.
Select a location from the list, then click the Set as My Location button, or double-click on the location name to use it as your location.
Click the Remove button to remove the selected location.
Your location settings are saved when you click the Close button and will be used the next time TheSky is started.
Alternatively, you can enter your latitude and longitude or U.S. zip code from the Custom tab.
Before entering your time zone, please carefully read “Time Zone Offset (Time Zone)” on page 38 and “Daylight Saving Option (DSO)” on page 38 for details about how TheSky uses these two settings.
A very common error is to manually change the Time Zone value by one hour when Daylight Saving Time is observed. TheSkydoes this automatically. If your local time is off by one hour, make sure the Time Zone is correct for your location, using the time zone definition above.
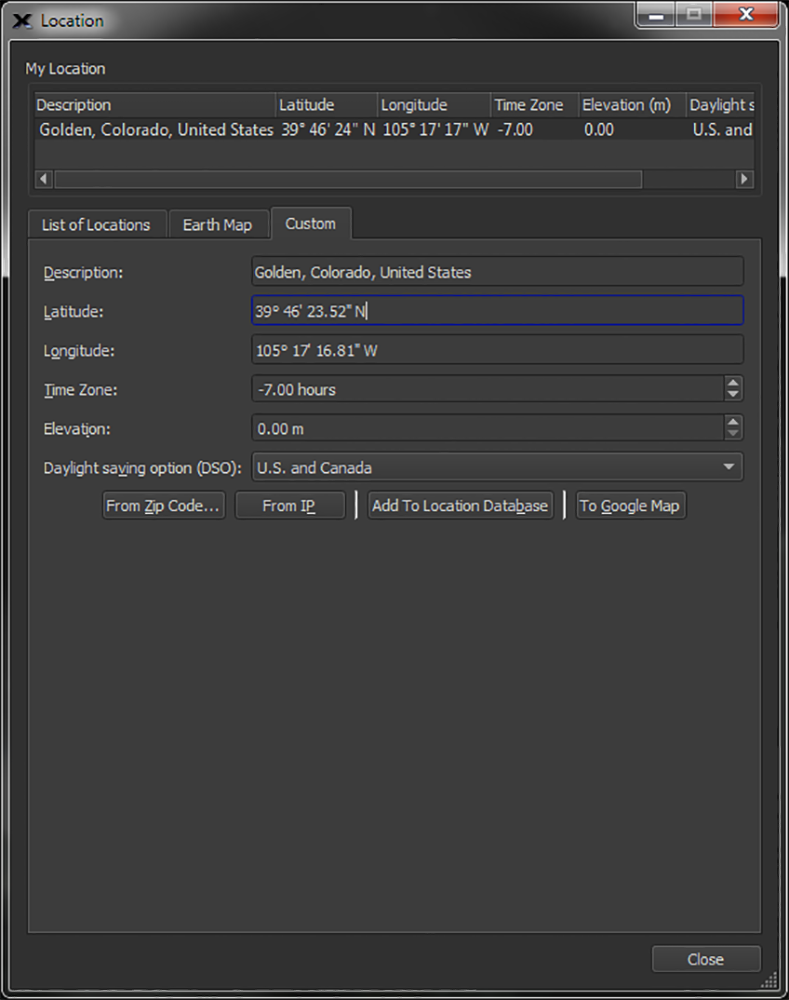
Figure 12: The Custom location tab (Location command, Input menu).
U.S. residents can enter a zip code to retrieve their approximate location from the web. If your computer is protected by a firewall, you may need to configure the firewall settings to allow TheSky to retrieve this information from the web.
If your computer is connected to the Internet, you can obtain reasonably accurate location data using your computer’s IP address. If your computer is protected by a firewall, you may need to configure the firewall settings to allow TheSky to retrieve this information from the web.
After manually entering your location details, click this button to permanently save them in TheSky’s Locations List.
Compare your coordinates to a Google map to make sure they are accurate. Or use the Google map to refine your location. Clicking the To Google Map button launches a browser and shows this location on a Google Map.
To refine the coordinates, adjust the map accordingly, right-click (z+left-click on macOS) on the map, or click the Satellite button to show the satellite photo of your observatory, for example, then click the Directions To command to show the precise latitude and longitude, in decimal format, of this point in the Driving Directions.
Highlight the latitude (the first coordinate that is shown), then select the Copy command from the Edit menu. From TheSky, right-click (z+left-click on macOS) and select the Paste command. Repeat this procedure for longitude.
When you are done, click the To Google Map button again to make sure the values you entered are correct. The coordinates of pointer on the map that appears should match your observing site.
|
|
Double-check your location before proceeding! Longitude, latitude and, most commonly, time zone errors result in sky charts that do not match what you see in the nighttime (or daytime) sky, and the telescope may not point accurately.
To verify your location is correct, click the To Google Map button to show a map for the specified longitude and latitude coordinates. This will show a map directly above the location.
|
|
|
Location changes are prohibited while TheSky is connected to a telescope. If you must change the local time when controlling a telescope (generally a poor practice), on the Date and Time window, turn off the Prohibit All Time Changes And Force Use Computer Clock checkbox. |
Yet another way to find home is to use the Location window’s Earth Map tab.
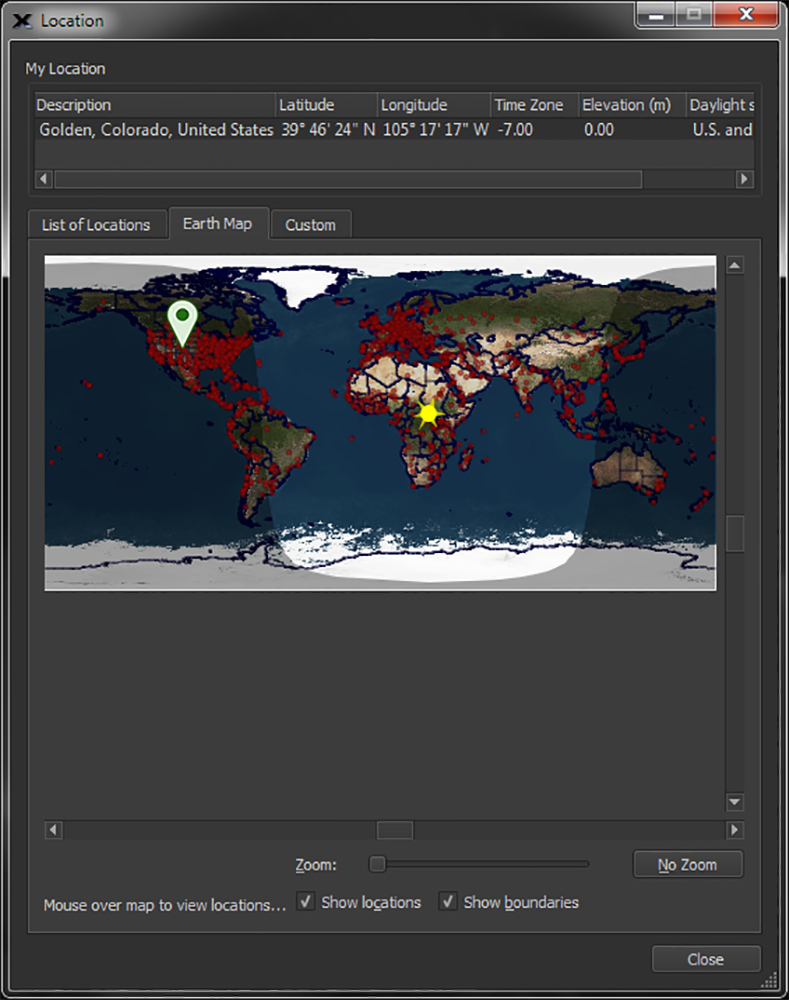
Figure 13: The Earth Map tab (Input > Location window).
The default view shows a map of the entire Earth with a red stick pin at the current location. Use the Zoom slider to change the magnification, and the scroll bars, or left drag on the map, to center the desired region. Turn on the Show Locations checkbox to overlay TheSky’s List of Locations on the map, indicated by a small red dot. The location descriptions will also appear at higher magnifications. The Show Boundaries option shows you the approximate country and U.S. state boundaries. Double-click on the map to choose the location beneath the mouse cursor.

