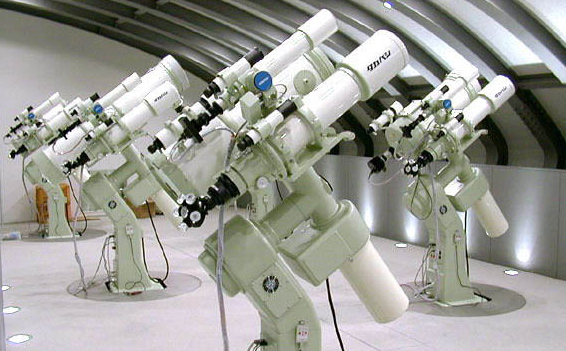
Figure 213: Takahashi Temma mounts. ã Takahashi.
TheSky can control Takahashi Temma model altitude/azimuth and equatorial mounts, including:
· EM-10 Temma PC Jr. (USD2)
· EM-200 Temma PC Jr. (USD2)
· EM-200 Temma PC
· NJP Temma PC
· EM-500 Temma PC
· EM-10 Temma2 Jr. (USD3)
· EM-200 Temma2 Jr. (USD3)
· EM-11 Temma2 Jr. (USD3)
· EM-200 Temma2
· EM-400 Temma2
· EM-500 Temma2
· Any Takahashi Temma or Temma2 mount.
· A Takahashi telescope cable (supplied with the mount).
TheSky must be configured correctly before it can communicate with the Temma mount. Make sure to set TheSky’s location, date, time, time zone and Daylight-Saving Time correctly before proceeding.
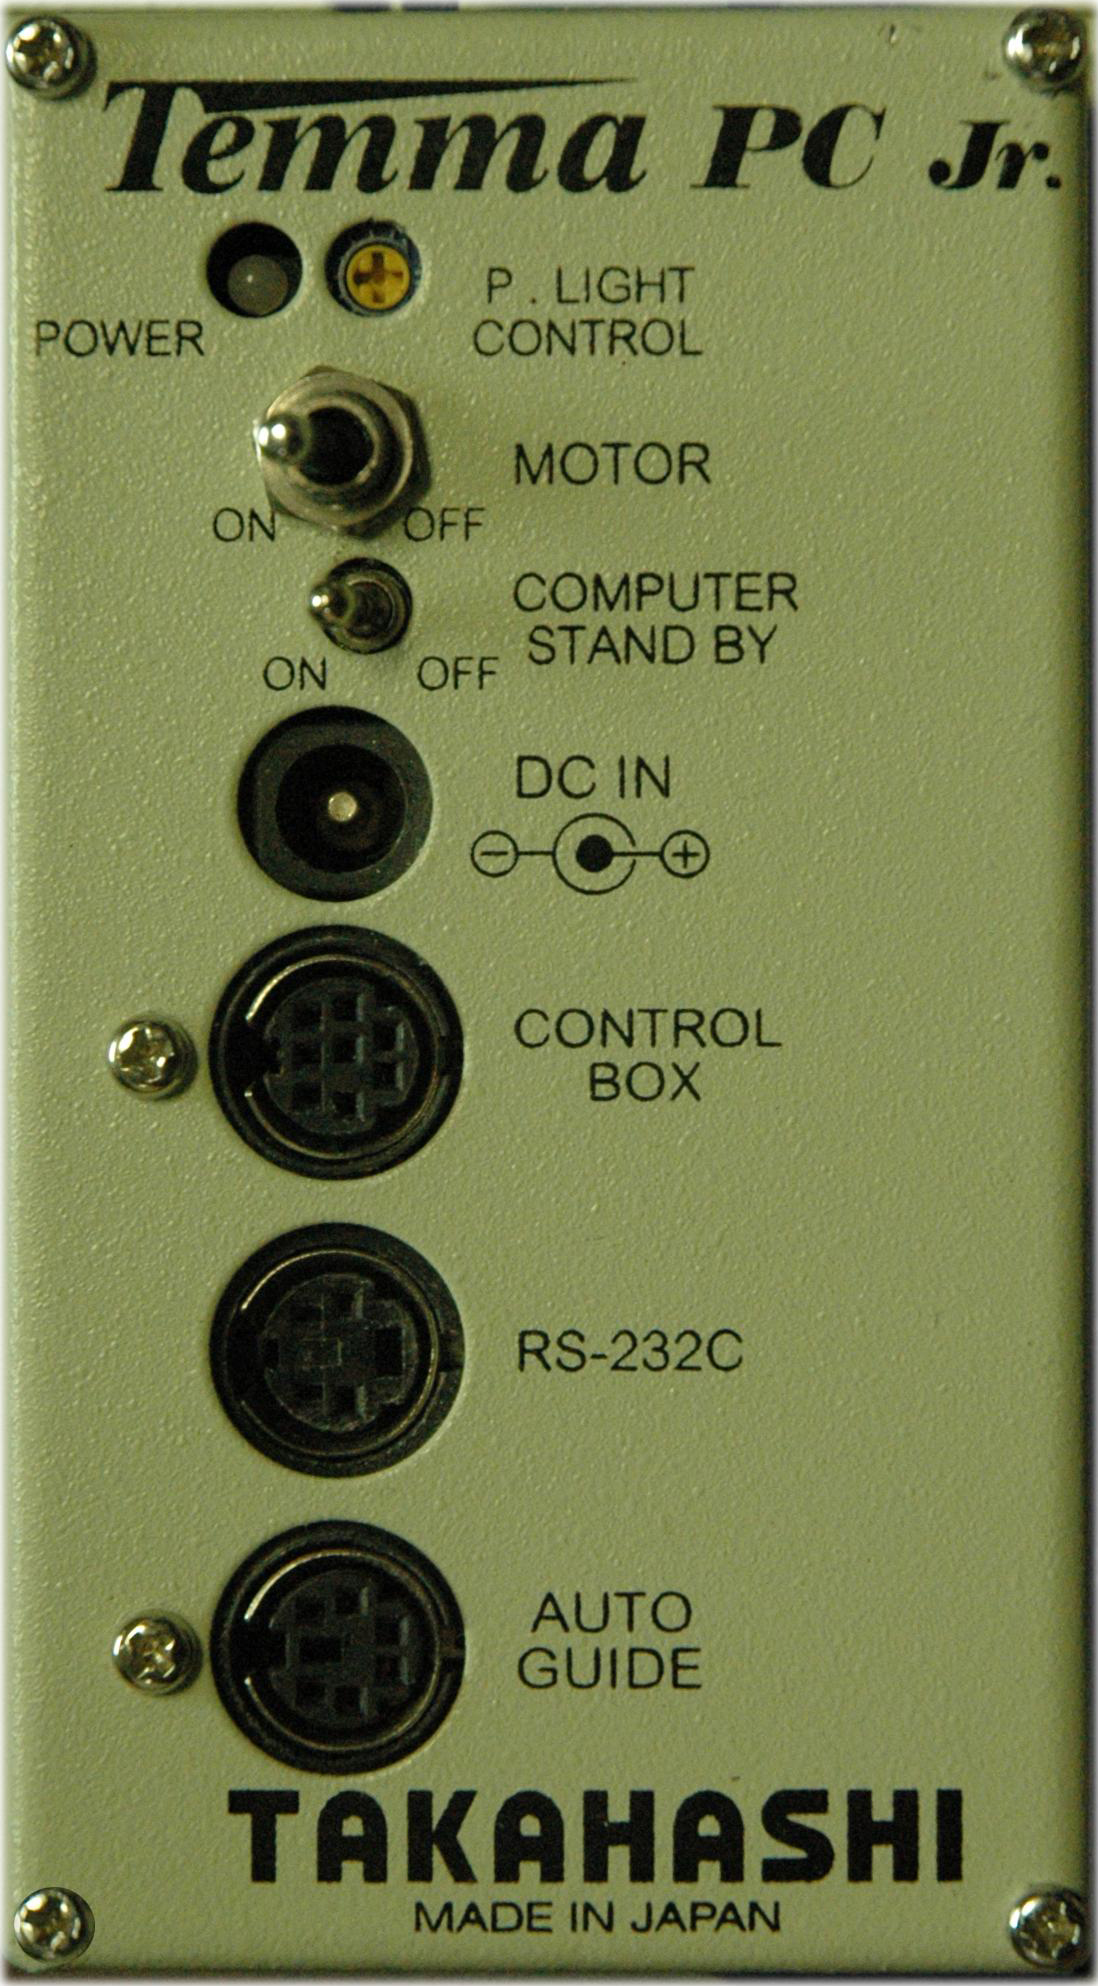
Figure 214: Temma PC Jr. Control Panel
1. Turn off the Temma telescope mount.
2. Using the gray Temma telescope cable (supplied with your mount), connect the round end to the port labeled RS-232C on the Temma mount, and the DB9 end to the USB to serial adaptor.
3. Turn the MOTOR and COMPUTER STAND BY switches to the ON position. When the Temma control system is powered on, it is initialized with the following default parameters.
· The control system “thinks” the optical tube assembly end of the declination axis is on the West side of the mount.
· The control system “thinks” telescope is pointing at right ascension 0.0 and declination 0.0.
· The right ascension and declination correction speeds are set to 90.
· The control system’s tracking direction is for the Northern Hemisphere.
These default parameters will not match the actual position of the optical tube assembly. TheSky allows you to correctly initialize the Temma’s control system to match the position of the OTA. See the steps below to do so.
1. Select the Telescope Setup command from the Telescope menu.
2. Select Mount in the Imaging System list on the left side of the Imaging System Setup window.
3. Select the Choose command from the Mount Setup pop-up menu.
4. On the Choose Mount window, select your model telescope and click OK. If the exact model of your telescope is not listed, don’t worry; just select a similar model telescope. The underlying serial communication protocol is the same for similar models.
5. Click the Settings command from the Mount Setup pop-up menu and then select the correct COM port (Windows) or the correct Serial Device (Mac).
6. Click Close.
7. Click the Connect command from the Telescope menu. The Temma’s local sidereal time and latitude are set based on TheSky's values. The telescope crosshairs appear on the Sky Chart at 0,0 right ascension/declination. The Temma’s tracking direction is automatically set based on TheSky’s North or South latitude setting.
8. Click the Star Synchronization command (page 398) on the Start Up pop-up menu, then follow the on-screen instructions to complete the initialization. See “Temma Synchronization” below for more information.
When the Temma mount is powered off, then on, the Temma control system’s right ascension/declination coordinates are always 0.0, 0.0.
At this point, you must point the telescope to a known position, and then synchronize TheSky at that position.
|
Synchronization Method |
Procedure |
|
To synchronize when the optical tube assembly end of the declination axis is on the West side of the mount. |
1. Loosen the clutches on the mount and orient the telescope so that the optical end of the declination axis is on the West side of the mount. 2. Keeping the OTA end of the declination axis on the West side of the mount, center a known star that is on the opposite side of the meridian. 3. Identify this star in TheSky (either by clicking on it or using TheSky’s Find command from the Edit menu.) 4. On the Telescope window, select the Synchronize command in the Start Up pop-up menu and follow the on-screen instructions. |
|
To synchronize when the optical tube assembly end of the declination axis is on the East side of the mount. |
1. Loosen the clutches on the mount and orient the telescope so that the optical end of the declination axis is on the East side of the mount. 2. Keeping the OTA end of the declination axis on the East side of the mount, center a known star that is on the opposite side of the meridian. 3. Identify this star in TheSky (either by clicking on it or using TheSky’s Edit > Find command.) 4. On the Telescope window, select the Synchronize command in the Start Up pop-up menu and follow the on-screen instructions. |
|
To synchronize by pointing the telescope at the zenith. |
1. Loosen the clutches on the mount and orient the telescope so that the optical tube assembly is pointing straight up (that is, the OTA is vertical). 2. Select the Temma command from the Display menu to show the Temma window if necessary. 3. Click the Settings tab on the Temma window. 4. Click the Sync At Zenith button on the Temma window. |
|
No synchronization. |
If the Temma has been initialized using other software, or is still initialized from a previous observing session (that is, you did not turn off the Computer Stand By switch on the mount).
Click the Connect command from the Telescope menu. |
The Temma control system has a built-in “backlash compensation” feature that attempts to minimize the effects of gear slop. When the mount is commanded to slew from TheSky, it slews past the object a small amount, then slews back to it in the direction of sidereal tracking.
Select the Temma command from the Display menu to show commands that are specific to this control system.
Note that this command is only available when the Temma is selected in the Mount pop-up menu on the Telescope > Setup window.
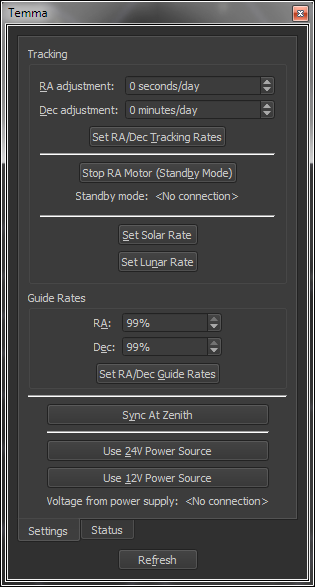
Figure 215: The Temma window’s Settings pane (Display menu).
The Settings tab provides Temma-control system specific mount settings for adjusting tracking rates, guide rates, and provides control system status.
Click this button to set the mount’s tracking rate to approximate the Sun’s rate of motion across the sky.
Enter the adjusted tracking rate for the right ascension axis in sidereal seconds per day. There are 86,164 seconds in one sidereal day (1 "earth day" = 1.002738 “sidereal day”). See the tracking rate example below.
Enter the adjusted tracking rate for the declination axis in minutes per day. See the tracking rate example below.
The following example shows how to set the Temma’s tracking rates to match (approximately) the Moon’s reported rate. This same procedure can be used for any solar system object.
1. From TheSky, click the Find command from the Edit menu.
2. Type Moon in the Find text box, and then click the Find button.
3. On the Object Information window report, note the RA Rate (arcseconds/sec) and the Dec Rate (arcseconds/sec). For this example, suppose RA = 0.4334 and Dec = 0.2567.
4. Compute the RA adjustment using the following equation: (TheSky’s RA Rate × –5760). The value is –2496.
5. Compute the Dec adjustment using the following equation: (TheSky’s Dec Rate × –1440). The value is –370.
6. Enter both values and click the Set Tracking Rates button.
Click this button to turn tracking off. Note that this command is not supported by all Temma models. You may wish to verify that the mount’s motor stops tracking before relying on this command to enter standby mode.
Enter the right ascension correction speed (as a percentage of the sidereal rate). This setting is used for the slow speed when using the Motion Controls.
Enter the declination correction speed (as a percentage of the sidereal rate).
Click this button to set the current tracking rate using the number entered in the New text box.
Click this button to synchronize the Temma mount when the OTA is pointing at the zenith.
Click this button to configure the Temma control system to use 12-volt power supply.
Click this button to configure the Temma control system to use 24-volt power supply.
· Issuing these commands when the Temma is slewing will cause the mount’s motors to stop.
· Even when a 12-volt power supply is used, clicking the 24V Power Source Button results in higher slew rates.
Displays the local sidereal time reported by the Temma control system, in hours, minutes and seconds.
For German equatorial mounts, the optical tube assembly (OTA) end of the declination axis can be located on the East or West side of the mount. The Temma reports which side of the mount it “thinks” the optical tube assembly is on. Select the appropriate side from the pop-up menu.
The Temma mount can use either 12V or 24V power. The actual voltage that is being supplied to the control system is shown here.
TheSky’s North/South latitude setting in the Input > Location window is used to configure the Temma’s direction of tracking.
Reports whether the Temma mount is in “standby mode,” which means the mount’s MOTOR switch (Figure 214 on page 453) is turned off. When this switch is in the off position, the mount’s right ascension axis will not track at the current tracking rate.
Temma PC Jr. mounts do not allow the mount’s tracking rate to be turned off through software (the Motor Power switch must be turned off to stop the motors from tracking at the current rate). Therefore, when the Park command is issued for this mount, TheSky still slews the mount to the park position, but it must then periodically slew back to the park position every few minutes (to undo the rotation or the right ascension axis that is the result of the mount tracking at the sidereal rate).
Note that “software-based parking and continuous rewinding” is a poor workaround to a fundamental shortcoming in the mount’s control system. Loss of communication between the mount and TheSky will prevent TheSky from correcting the mount’s park position and will most likely result in the mount tracking into itself. This unfortunate event will most likely cause damage to the mount, equipment, cabling or all three. The Temma control system has no built-in software or hardware tracking limits, and it will try to rotate the right ascension axis even after the mount has tracked into a fixed object like, such as the pier.